How Do I Update the WordPress Core?
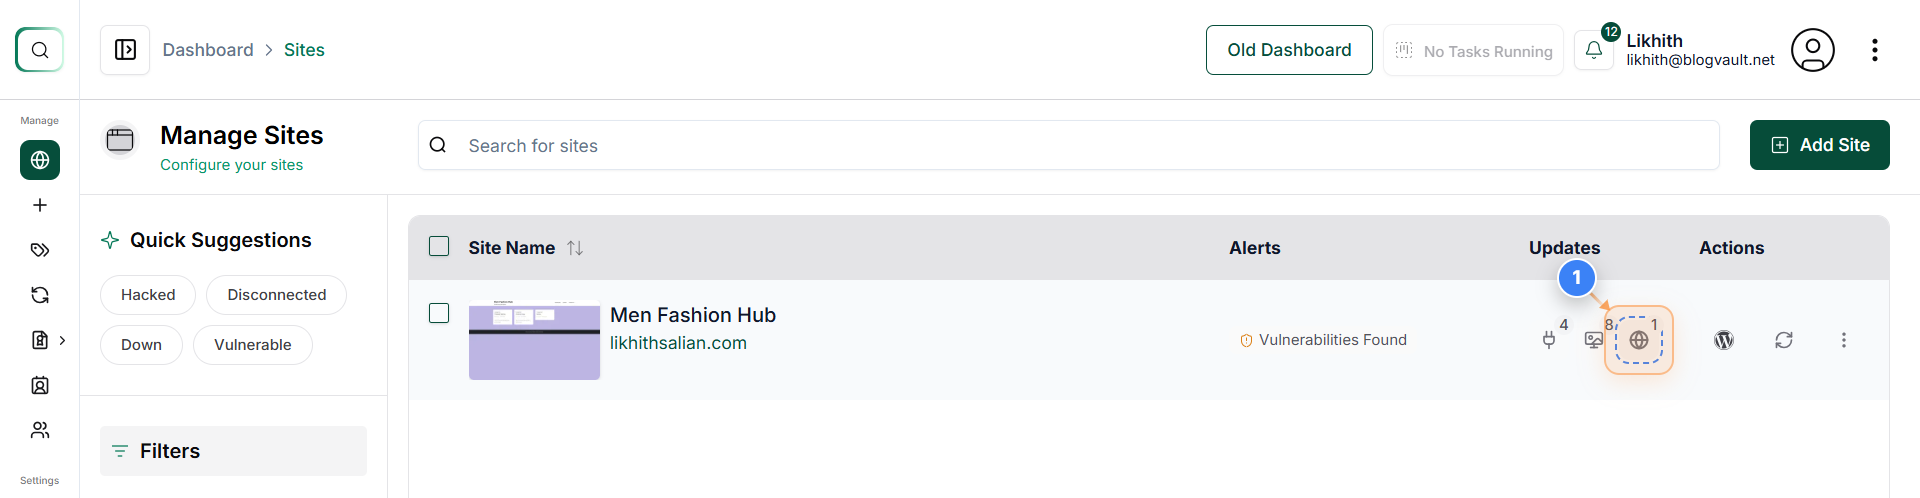
Step 1 of 4
Open Site Management Dashboard
Click the “WordPress Core Update Available” button on the right side of the Sites page to proceed with the WordPress core update.
Note: Use this option to update the WordPress versions.
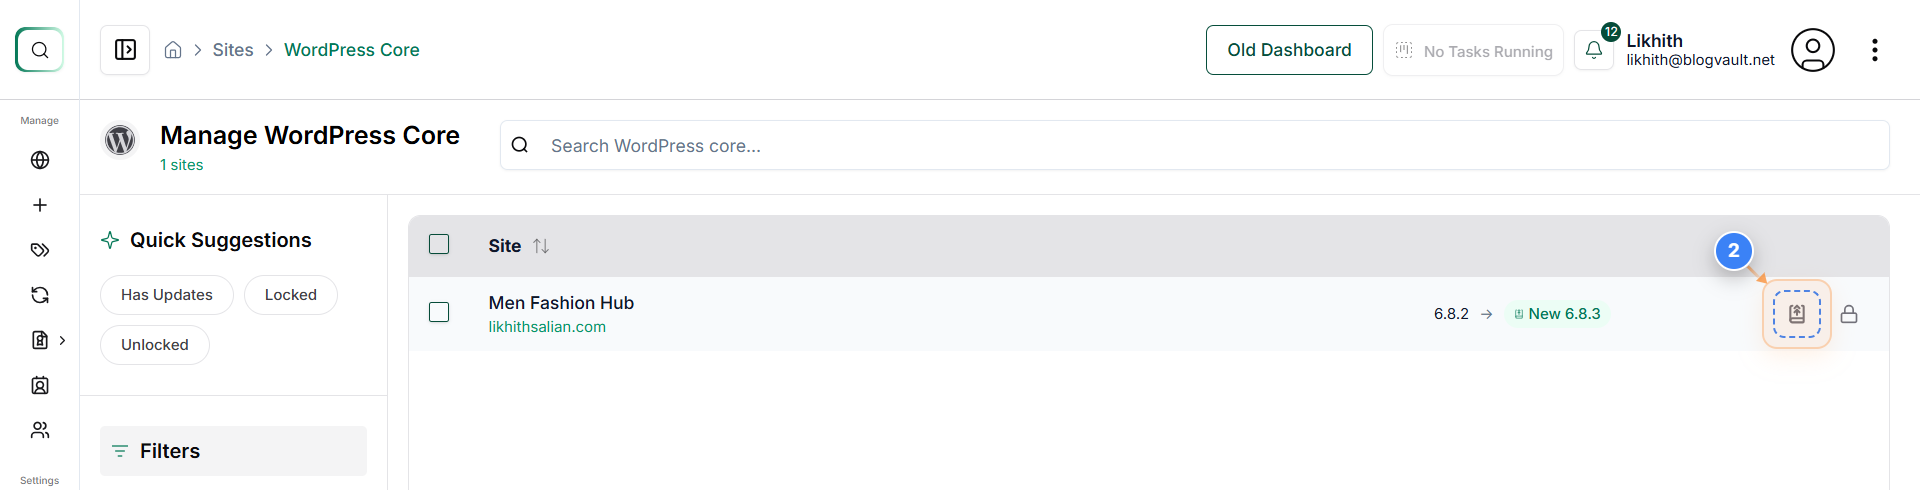
Step 2 of 4
Access WordPress Core Update Settings
Click the “Update WordPress Core” button on the right side of the page to confirm the update.
Note: This allows you to review the current WordPress version and the available updates before applying them.
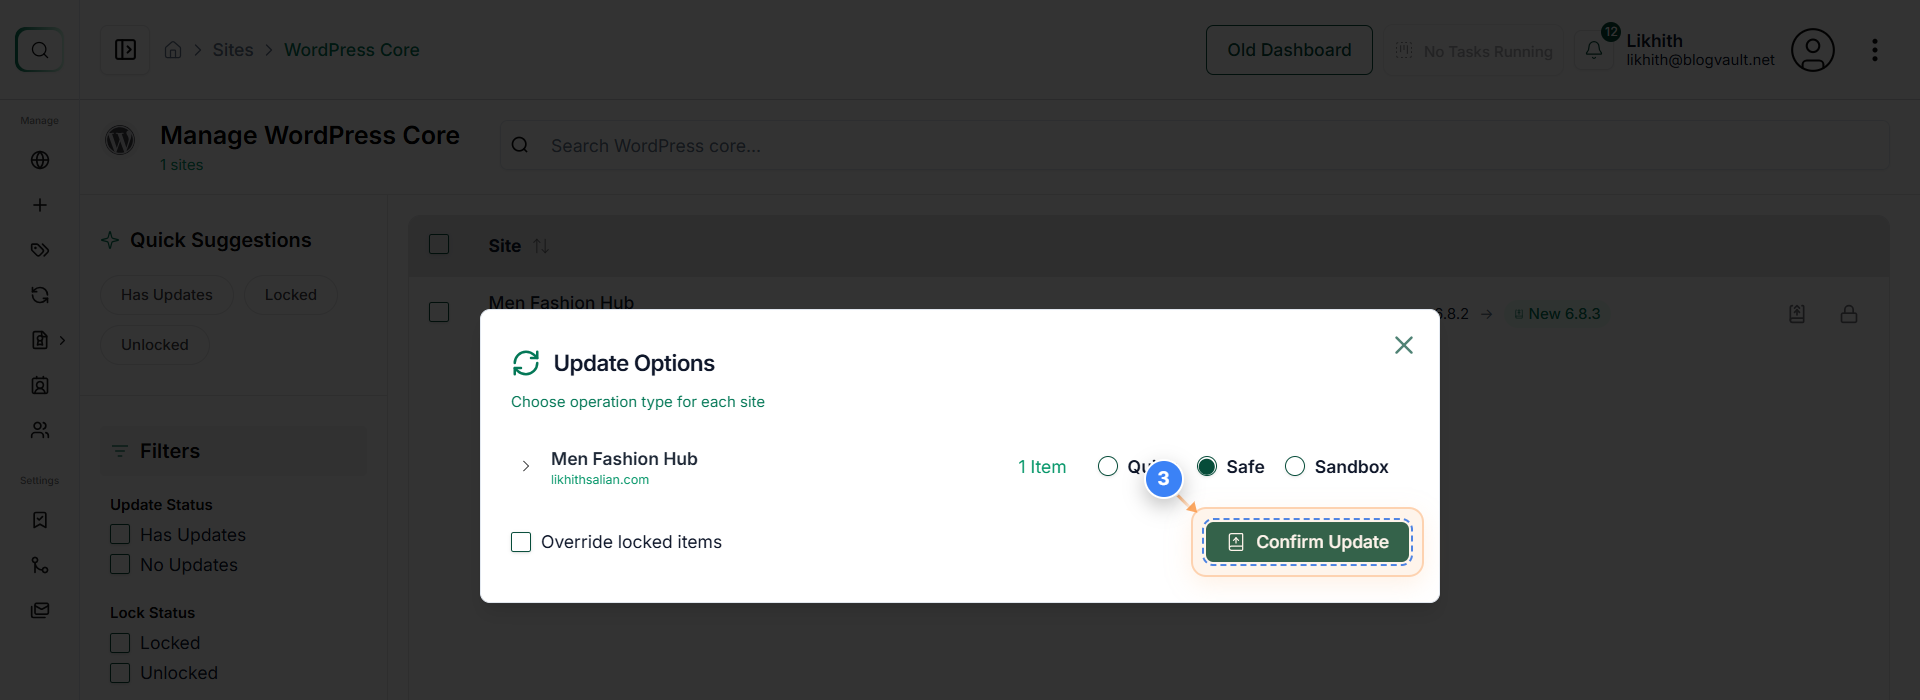
Step 3 of 4
Confirm WordPress Core Update
In the update dialog, select the preferred update process - Quick, Safe, or Sandbox - and click the 'Confirm Update' button to start updating the WordPress core.
Note: Selecting 'Safe' mode is recommended for most users as it ensures a pre-update backup and rollback option if needed.
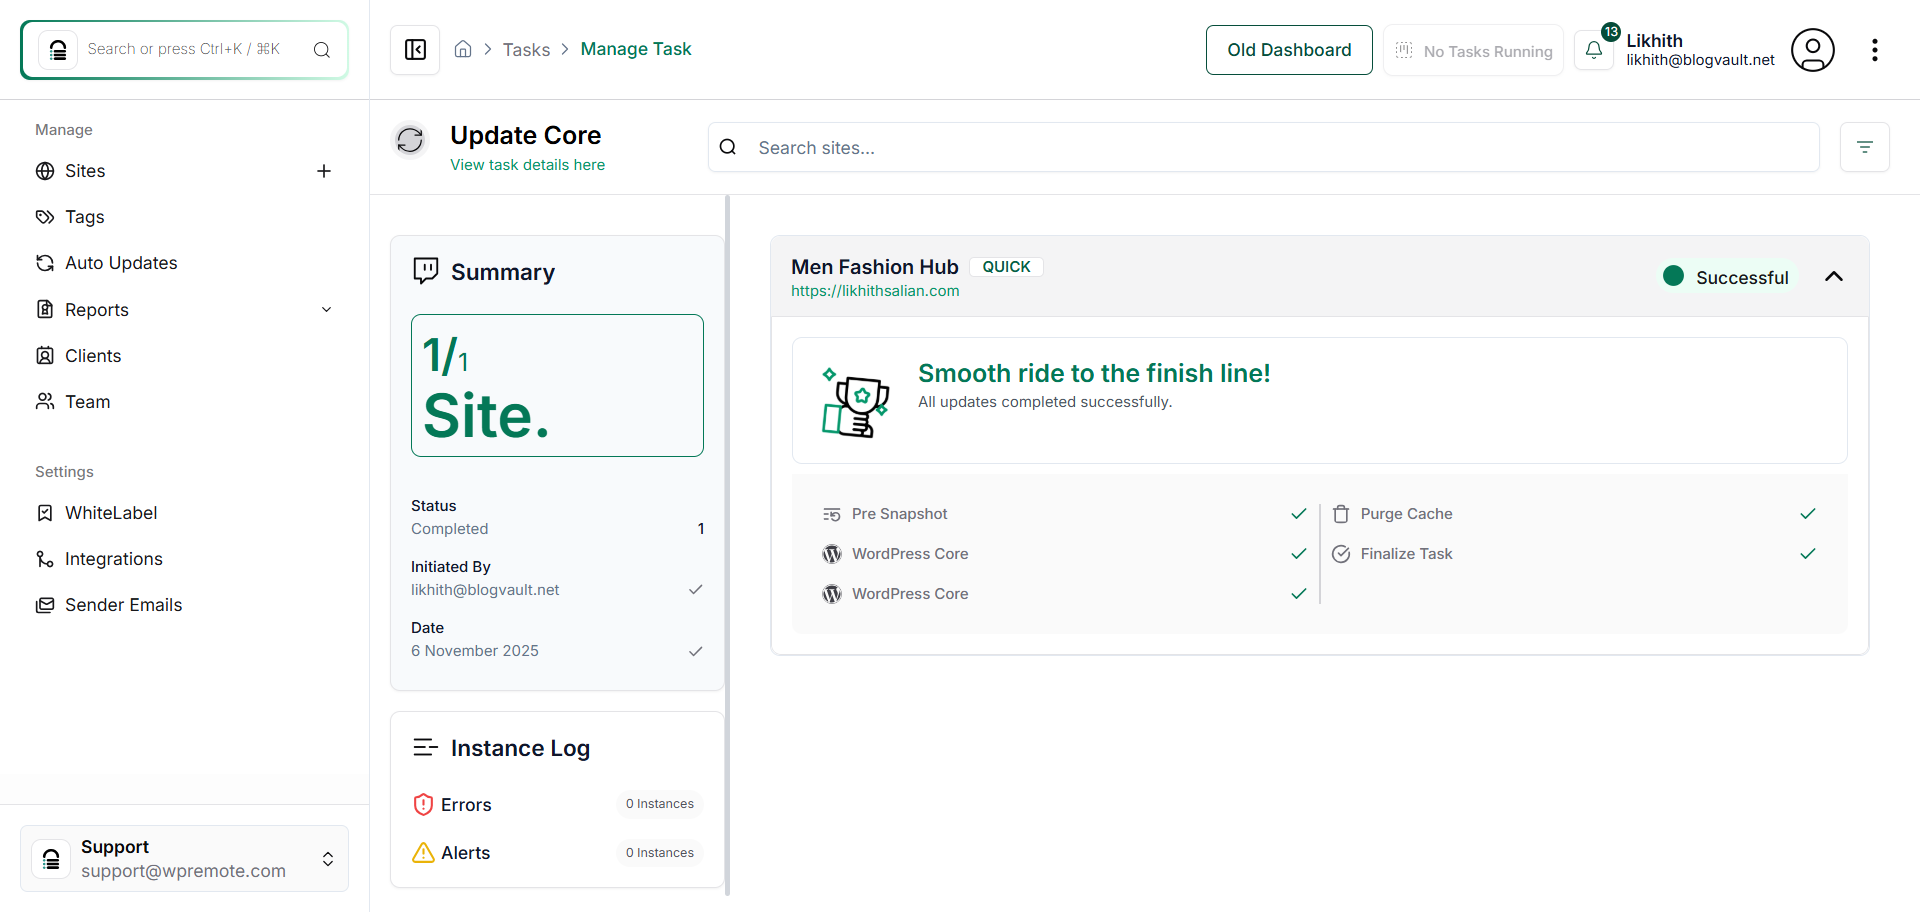
Step 4 of 4
Verify Update Completion
The Task Summary page confirms that the WordPress core update has been successfully completed. Review the status indicators and task details to ensure the update finished without errors.
Note: Look for a 'Successful' status and zero errors in the summary. If errors are shown, revisit the update process or contact support for assistance.